1: Proxy Server Setup
What is a Proxy Server?
A proxy server sits between a web browser and a web server, recording and passing information between each. Once configured, every time you click a link or submit a form your browser is sending a request to a target server. These requests are recorded by screen-scraper then relayed to the target web server. The web server will then send corresponding responses back. screen-scraper records these responses and passes them to your browser.
Proxy transactions
All requests and responses are referred to as Transactions. A single click can generate many different transactions. Only some of these transactions are actually useful. You will be learning how to take individual transactions and convert them into Scrapeable Files for use during your scraping session.
Start screen-scraper
To begin you will first need to open up screen-scraper:
On Unix/Linux or Mac OS X use the screen-scraper link that was created when you installed screen-scraper.
If you're running Windows, this is done by selecting the appropriate link from the Start menu.
Once screen-scraper has loaded you'll see the objects tree on the left (it likely only contains the Root Folder currently). Let's create our first object.
Creating a Proxy Session
A proxy session is a screen-scraper object that allows you to interact with the proxy server and its records. You'll generally use one each time you create a new scrape.
Create a proxy session now by clicking the (Add a new proxy session) icon.
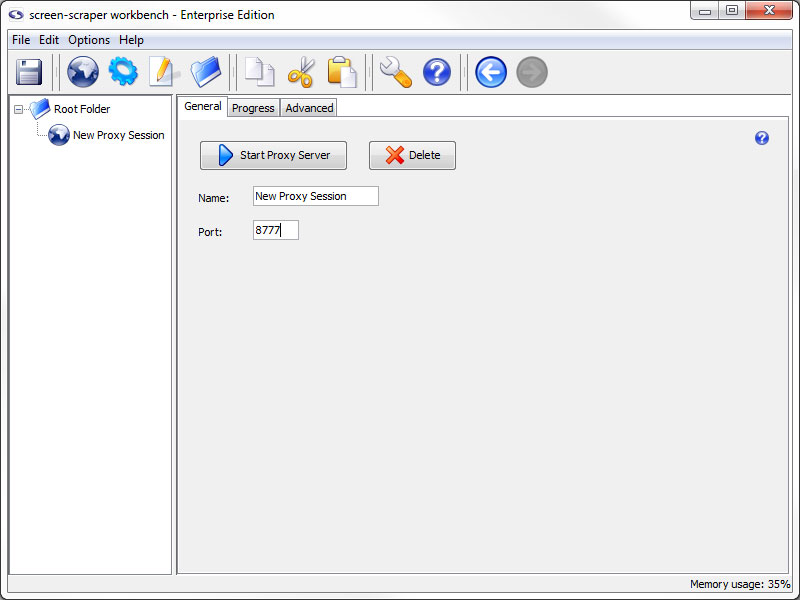
Configuring the Proxy Session
Give the proxy session the name Hello World. Leave the port at 8777.
Configure Browser to Use Proxy Session
If you have multiple web browsers installed on your computer we recommend using one of them to continue through the tutorial and the other to interact with the proxy server. For example, if you have Internet Explorer and Firefox installed you may want to view the tutorial pages using Firefox and use Internet Explorer with the proxy server.
Choose your browser:
Once configured your browser will send all requests through screen-scraper's proxy. This means all links you click or any forms you submit will be sent first to screen-scraper's proxy where it will be recorded. The proxy will then relay your request to the target server.
When the server responds to your request each response will first arrive at screen-scraper's proxy where it will be recorded. The proxy then sends the response to your browser.
If you're running Mac OS X, and are using screen-scraper Professional or Enterprise Edition, there's one more step you'll need to take: In screen-scraper, click the (settings) icon to bring up the Servers button in the panel on the left, then remove any text contained in the Hosts to allow to connect text box. Because of the way Mac OS X handles IP addresses, we do this so that screen-scraper will accept connections from your web browser.
Starting the Proxy Server
Click the Start Proxy Server button in your proxy session. Then, click on the Progress tab.
You're now ready to have screen-scraper record a few pages for you.
- Printer-friendly version
- Login or register to post comments