9: Logging In
How Logging In Works
Oftentimes it's necessary to log in to a web site before extracting the information you're interested in. This is generally quite a bit easier than it might seem. Typically this simply involves creating a scrapeable file to handle the login that will get invoked before any of the other pages. The shopping site we're scraping from doesn't require us to log in before performing searches, but for the sake of this tutorial we'll set it up as if it did.
Before we look at the page that handles the actual login, we need to have screen-scraper request the home page for the shopping site. This is necessary because it allows for a few initial cookies to be set before we attempt to log in. If you're familiar with web programming, we're requesting the home page so that the server can create a session for us (tracked by the cookies) prior to our attempting a login. By having screen-scraper request the home page, those cookies will get set, and screen-scraper will then automatically track them for us.
Homepage Scrapeable File
Create a scrapeable file for the home page by clicking on the Shopping Site scraping session in the objects tree, then on the Add Scrapeable File button.
Give the new scrapeable file the name Home, set its sequence to 1, and give it the URL http://www.screen-scraper.com/shop/.
Recording Login Request
Login HTTP requests are usually POST requests, which makes it trickier to tell what parameters are being passed to the server (i.e., the parameters won't appear in the URL). The proxy server can make viewing the parameters easier, so let's make use of it.
Open your web browser to the shopping login page:
In screen-scraper click on the Shopping Site proxy session, then the Start Proxy Server button (found on the General tab).
Now that the proxy server is running, click on the Progress tab. Remove any HTTP transactions that are already there by clicking the Clear All Transactions button then configure your web browser to use screen-scraper as a proxy server as you did earlier.
Site Login
Using your web browser, log into the site. This can be done by typing [email protected] in the E-Mail Address field and testing in the Password field, then clicking the login button.
Once the page loads, return to the General tab and click the Stop Proxy Server button to stop recording. Re-configure your web browser so that it no longer uses screen-scraper as a proxy server.
If you paid close attention to screen-scraper as it was working you may have noticed that two rows were added to the HTTP Transactions table (it's actually possible that three were added; if so, just delete the last one by highlighting it and hitting the Delete key on your keyboard). Click on the first row in the table. The URL should begin with:
This is the actual login POST request. If you scroll down in the lower section and look in the POST data text box you'll see the email address and password we entered in earlier. You'll also notice that x and y parameters were passed in (these simply represent the coordinates where you clicked the login button).
If you click on the Response tab, once again in the lower section, you'll notice that the Status Line field shows a response code of 302 Found.
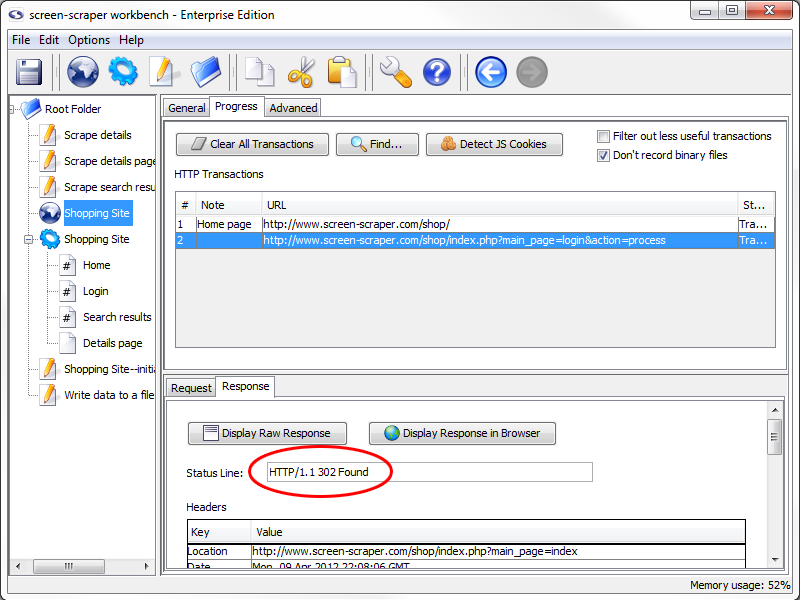
This is a redirect response, which indicates that the browser should be directed to a different URL. When this response was issued by the server your browser faithfully followed to the second URL and screen-scraper recorded the new HTTP Transaction.
Login Scrapeable File
At this point we'll want to copy the login POST request to our scraping session. We only need the login transaction from the table (the one with the POST data) and not the request representing the redirect, since screen-scraper will automatically follow redirects for us.
Copy the HTTP transaction to your scraping session by clicking on the login request (the one corresponding to the POST request). Ensure that the Shopping Site scraping session is selected in the drop-down list, then click the Go button.
After the new scrapeable file is created under the scraping session, rename it Login. Also, set its sequence to 2. It should be requested right after the Home scrapeable file. screen-scraper automatically tracks cookies, just like a web browser, so by requesting it near the beginning any subsequent pages that are protected by the login will be accessible.
Click the Parameters tab in our Login scrapeable file. You'll notice that screen-scraper automatically extracted out the various POST parameters and added them to the scrapeable file.
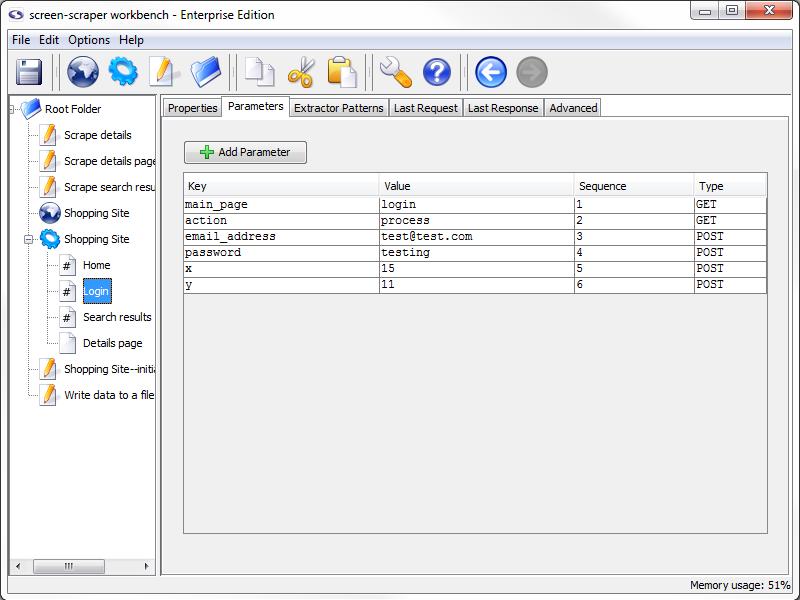
If you're familiar with URL encoding, you'll also notice that screen-scraper decoded the email_address parameter to [email protected]. screen-scraper automatically URL encodes parameters found under the Parameters tab before passing them up to the server.
Run with Login
At this point feel free to run the scraping session again. Because our site doesn't require logging in before searching can take place it won't make much difference, but you'll at least be able to see the login page being requested in the log for the scraping session.
- Printer-friendly version
- Login or register to post comments