Scraping Sessions
Overview
A scraping session is simply a way to collect together files that you want scraped. Typically you'll create a scraping session for each site from which you want to scrape information.
Managing Scraping Sessions
Adding
- Select New Scraping Session from the menu.
- Click the gear in the button bar.
- Right click on a folder in the objects tree and select New Scraping Session.
- Use the keyboard shortcut Ctrl-K
Removing
- Press the Delete key when it is selected in the objects tree
- Right-click on the scraping session in the objects tree and select Delete.
- Click the Delete button in the general tab of the scraping session.
Importing
- Right-click on the folder in the objects tree that you want to import the files into (other than the root folder) and select Import Into. In the window that opens, navigate to and select the scraping session you want to import.
- Select Import from the menu. In the window that opens, navigate to and select the scraping session you want to import.
- Add the scraping session to the import folder in screen-scraper's install directory
screen-scraper should not be running when you add the file into the folder. All files will be imported into the root folder the next time screen-scraper starts.
Exporting
When a scraping session is exported it will use the character set indicated under the advanced tab. If a value isn't indicated there it will use the character set indicated in the general settings.
- Right-click on the scraping session in the objects tree and select Export.
- Click the Export button in the general tab of the scraping session.
Scraping Session: General tab
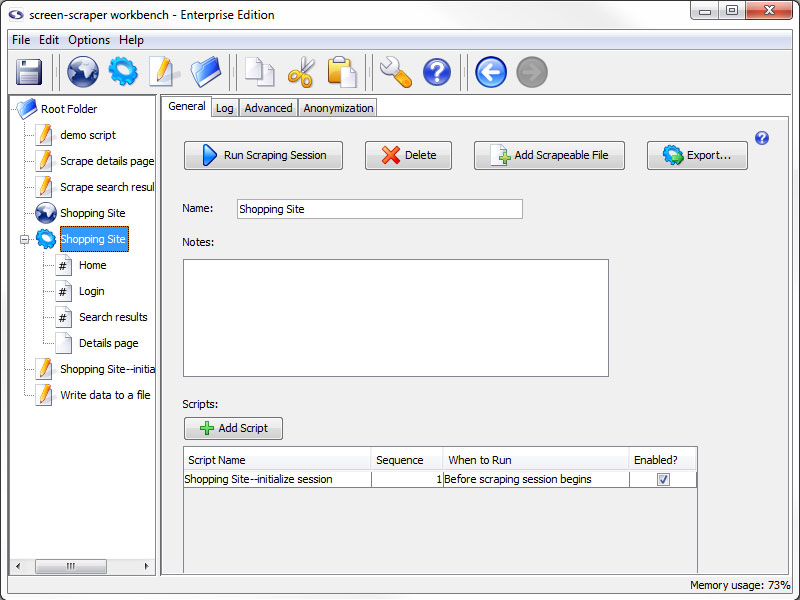
General Tab
- Run Scraping Session: Starts the scraping session. Once the scraping session begins running you can watch its progress under the Log tab.
- Delete: Deletes the scraping session.
- Add Scrapeable File: Adds a new scrapeable file to this scraping session.
- Export: Allows you to export the scraping session to an XML file. This might be useful for backing up your work or transferring information to a different screen-scraper installation.
- Name: Used to identify the scraping session. The name should be unique relative to other scraping sessions.
- Notes: Useful for keeping notes specific to the scraping session.
- Scripts: All of the scripts associated with the scraping session.
- Add Script: Adds a script association to direct and manipulate the flow of the scraping session.
- Script Name: Specifies which script should be run.
- Sequence: The order in which the scripts should be run.
- When to Run: When the scraping session should run the script.
- Enabled: A flag to determine which scripts should be run and which shouldn't be.
Each script can be designated to run either before or after the scraping session runs. This can be useful for functions like initializing session variables and performing clean-up after the scraping session is finished. It's often helpful to create debugging scripts in your scraping session, then disable them once you're ready to run your scraping session in a production environment.
Scraping Session: Log tab
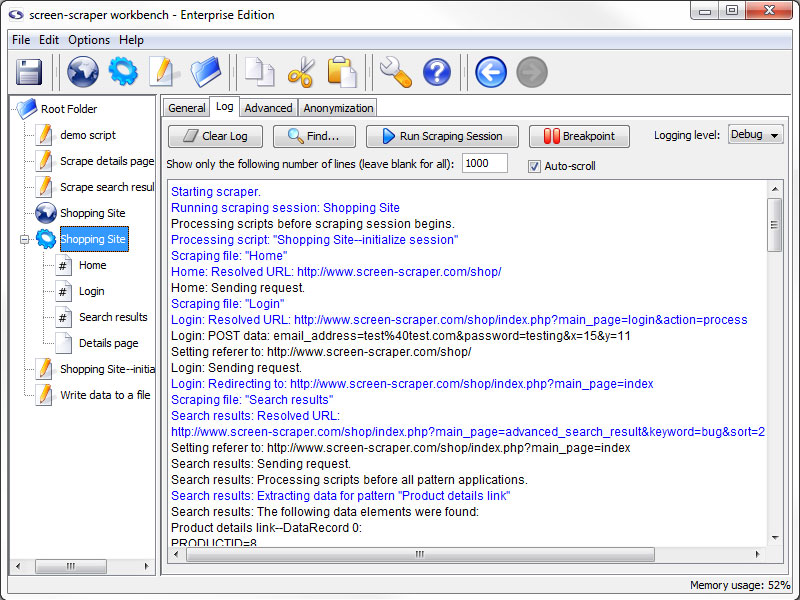
Log Tab
- Clear Log: Erase the current contents of the log.
- Find: Search the log for the specified text.
- Run Scraping Session / Stop Scraping Session: Start/Stop the scraping session.
- Breakpoint (professional and enterprise editions only): Pause the scrape and open a breakpoint window.
- Logging Level (professional and enterprise editions only): Determines what types of messages appear on the log. This is often referred to as the verbosity of the log. This effects the file system logs as well as the workbench log.
- Show only the following number of lines: The number of lines that the log should maintain as it runs. When it is left blank it will keep everything.
- Auto-scroll: When checked, the log will make sure that you can always see the most recent entries into the log on the screen.
If you are trying to troubleshoot problems with scripts not working the way you expected the log can give you clues as to where problems might exists. Likewise, you can have your scripts write to the log to help identify what they are doing.
This tab displays messages as the scraping session is running. This is one of the most valuable tools in working with and debugging scraping sessions. As you're creating your scraping session you'll want to run it frequently and check the log to ensure that it's doing what you expect it to.
Scraping Session: Advanced tab
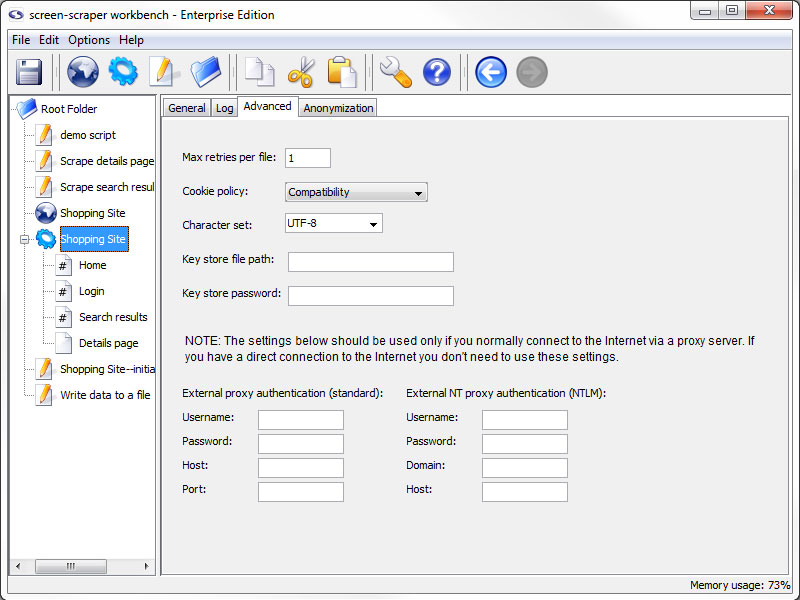
Advanced tab
- Max retries per file (professional and enterprise editions only): The number of times that screen-scraper should attempt to request a page, in the case that a request fails. In some cases web sites may not be completely reliable, which could necessitate making the request for a given page more than once.
- Cookie policy (professional and enterprise editions only): The way screen-scraper works with cookies. In most cases you won't need to modify this setting.
There may be instances where you find yourself unable to log in to a web site or advance through pages as you're expecting. If you've checked other settings, such as POST and GET parameters, you may need to adjust the cookie policy. Some web sites issue cookies in uncommon ways, and adjusting this setting will allow screen-scraper to work correctly with them.
- Character set (professional and enterprise editions only): Set the character set for the scraping session.
If pages are rendering with strange characters then you likely have the wrong character set. You should also try turning off tidying if international characters aren't being rendered properly.
- Key store file path: The path to a JKS file that contains the certificates required for this scrape
- Key store password: The password used when generating the JKS file
Some web sites require that you supply a client certificate, that you would have previously been given, in order to access them. This feature allows you to access this type of site while using screen-scraper.
- External proxy authentication: These text boxes are used in cases where you need to connect to the Internet via an external proxy server.
- Username: Your username on the proxy server.
- Password: Your password on the proxy server.
- Host: The host/domain of the proxy server
- Port: The port that you use on the host server.
- External NT proxy authentication: These text boxes are used in cases where you need to connect to the Internet via an external NT proxy server.
If you are using NTLM (Windows NT) authentication you'll need to designate settings for both the standard proxy as well as the NTLM one.
- Username: Your username on the NT proxy server.
- Password: Your password on the NT proxy server.
- Domain: The domain/group name that the NT proxy server uses.
- Host: The host of the proxy server.
Scraping Session: Anonymization tab
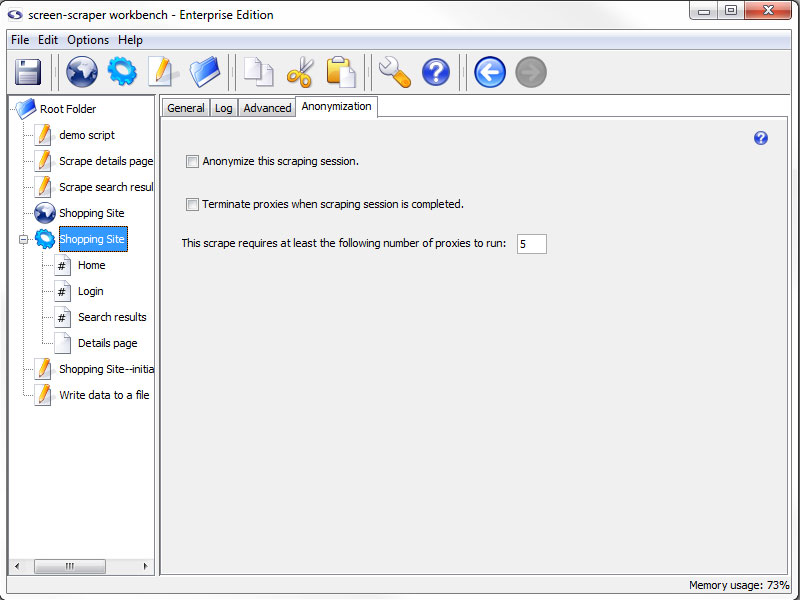
Anonymization Tab (professional and enterprise editions only)
- Anonymize this scraping session (professional and enterprise editions only): Specifies that this scraping session should make use of the anonymization settings of screen-scraper.
- Terminate proxies when scrapping session is completed (professional and enterprise editions only): Determines whether the scraping session should terminate proxies or leave them open.
- This scrape requires at least the following number of proxies to run (professional and enterprise editions only): The required number of proxies for the scrape to run.
Should proxy servers fail to spawn screen-scraper will proceed forward with the scraping session once at least 80% of the minimum required proxy servers are available.
This tab is specific for automatic anonymization For more information on anonymization, see our page on how to set it up anonymization in screen-scraper.